
How to Integrate x402 Payments to Your Website: A Complete Tutorial
Ready to Build the Future of Web Payments? You now have everything you need to integrate x402 payments into your website. But you don't have to do it alone!

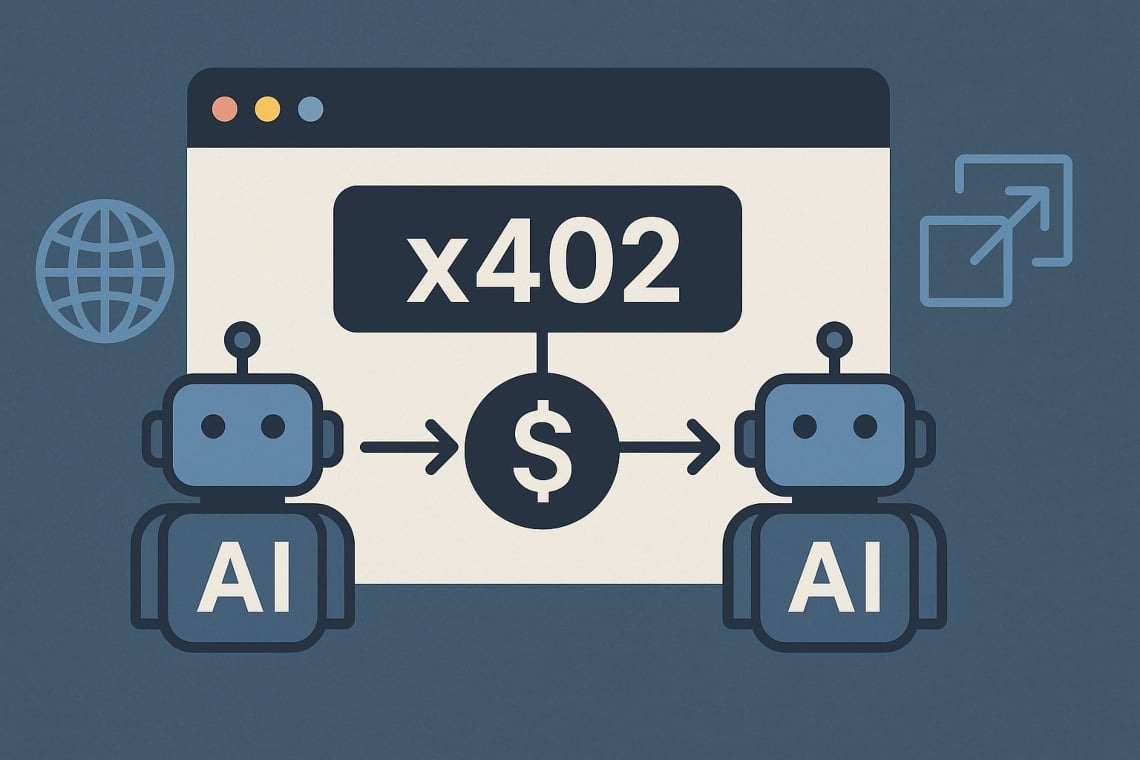
Introduction
The x402 protocol is revolutionizing web monetization, enabling websites to receive instant, global payments for digital products, services, and content. Whether you run a SaaS, a content portal, or an AI-powered API, integrating x402 lets you unlock pay-per-use models no traditional payment processor can match.
🚀 Join our exclusive Telegram community for live support, code samples, and expert help: Join x402 Developers & Builders
This tutorial will walk you through every step, from setup to live deployment—and our community is here to help you succeed!
Table of Contents
Prerequisites
How x402 Payment Flow Works
Step 1: Prepare Your Web Environment
Step 2: Choose Your Blockchain & Wallet
Step 3: Implement x402 Payment Requests
Step 4: Connect with User Wallets
Step 5: Verify and Unlock Access
Step 6: Go Live and Monetize!
Advanced Tips & Community Resources
FAQs and Troubleshooting
1. Prerequisites
Before diving in, make sure you have:
Basic understanding of web development (HTML, JavaScript, API logic)
Crypto wallet installed (e.g. MetaMask, Coinbase Wallet)
A small amount of stablecoins (e.g. USDC) on a supported Layer 2 blockchain (such as Base or Optimism)
💡 New to crypto wallets or Layer 2? Join our Telegram group where members share beginner-friendly setup guides daily!
2. How x402 Payment Flow Works
Here’s the simple flow:
User tries to access a paid feature or content.
Server responds with HTTP 402 (Payment Required), including payment instructions.
User’s wallet prompts for payment.
Upon successful payment, access is instantly granted.
3. Step 1: Prepare Your Web Environment
Example: Node.js + Express.js API, but you can adapt for any stack.
// Express.js Example
const express = require(’express’);
const app = express();

app.get(’/premium-data’, (req, res) => {
    if (!req.userHasPaid) {
        // Respond with HTTP 402 and payment details
        return res.status(402).json({
            message: ‘Payment required.’,
            payment_address: ‘0xYourWalletAddress’,
            amount: 0.5, // Amount in USDC
            network: ‘Base’,
            currency: ‘USDC’
        });
    }
    // User has paid: send premium data
    res.json({ data: ‘Super Premium Content Here!’ });
});

app.listen(3000, () => console.log(’Server running on port 3000’));
🔧 Need help setting up your environment? Our Telegram community has developers who can troubleshoot in real-time!
4. Step 2: Choose Your Blockchain & Wallet
Popular choices for x402:
Base (Coinbase Layer 2): Fast, low fees, excellent x402 support
Optimism: Ethereum Layer 2 with broad adoption
Solana: Ultra-fast for high-volume transactions
Set up your receiving wallet and secure your private keys. Never share them publicly!
📲 Questions about which blockchain to choose? Ask in our Telegram group and get recommendations from developers already live with x402!
5. Step 3: Implement x402 Payment Requests
Send payment instructions when access is attempted without prior payment:
Required Information:
Payment amount (in stablecoin/token)
Supported network(s)
Your wallet address
Optional: Transaction deadline
// Payment instruction object
const paymentInfo = {
    protocol: ‘x402’,
    amount: ‘0.50’,
    currency: ‘USDC’,
    network: ‘Base’,
    recipient: ‘0xYourWalletAddress’,
    memo: ‘Premium API Access’
};
6. Step 4: Connect with User Wallets
Integrate a web3 wallet connector in your frontend for seamless UX.
Example: Using ethers.js with MetaMask
import { ethers } from “ethers”;

async function payForAccess(recipientAddress, amount) {
    if (!window.ethereum) {
        alert(”Please install MetaMask or another Web3 wallet!”);
        return;
    }

    try {
        const provider = new ethers.providers.Web3Provider(window.ethereum);
        await provider.send(”eth_requestAccounts”, []);
        const signer = provider.getSigner();

        // For USDC (ERC-20 token), use contract interaction
        const usdcContract = new ethers.Contract(
            USDC_CONTRACT_ADDRESS,
            [’function transfer(address to, uint amount) returns (bool)’],
            signer
        );

        const tx = await usdcContract.transfer(
            recipientAddress,
            ethers.utils.parseUnits(amount.toString(), 6) // USDC has 6 decimals
        );

        await tx.wait(); // Wait for confirmation
        return tx;
    } catch (error) {
        console.error(”Payment failed:”, error);
    }
}
⚡ Get complete, tested code examples in our Telegram community! Members regularly share working implementations and debugging tips.
7. Step 5: Verify and Unlock Access
After payment is sent, verify the transaction on-chain:
Methods:
Webhook listeners (via Alchemy, Infura, or QuickNode)
Polling the blockchain for transaction status
User provides transaction hash for manual verification
async function verifyPayment(txHash, expectedAmount, recipientAddress) {
    const provider = new ethers.providers.JsonRpcProvider(YOUR_RPC_URL);
    const tx = await provider.getTransaction(txHash);
    const receipt = await provider.getTransactionReceipt(txHash);

    if (receipt && receipt.status === 1) {
        // Transaction successful
        // Verify amount and recipient match
        return true;
    }
    return false;
}
Once verified, grant access by:
Setting a session cookie/token
Updating database permissions
Redirecting to premium content
🛠️ Stuck on verification logic? Join our Telegram where experienced builders share proven verification patterns!
8. Step 6: Go Live and Monetize!
Pre-Launch Checklist:
✅ Test on testnets (Base Goerli, etc.)
✅ Test with small real amounts
✅ Ensure mobile wallet compatibility
✅ Create clear user instructions
✅ Set up payment monitoring/alerts
✅ Prepare customer support flow
Launch Strategy:
Soft launch to beta users
Gather feedback
Optimize UX
Scale marketing
🎯 Want feedback before launch? Share your implementation in our Telegram group and get real user testing from the community!
9. Advanced Tips & Community Resources
Advanced Integration Features:
✅ Multi-Network Support
Accept payments on Base, Optimism, Solana simultaneously
Auto-detect user’s preferred network
✅ Dynamic Pricing
Adjust prices based on demand, user tier, or content type
✅ Subscription Models
Recurring x402 payments for ongoing access
✅ Analytics Dashboard
Track revenue, popular content, user behavior
✅ Fraud Prevention
Implement rate limiting, IP checks, duplicate transaction detection
💎 Get access to premium resources:
Complete code repositories
Video walkthroughs
Live Q&A sessions with x402 experts
Early access to new tools and SDKs
Join our exclusive Telegram community now!
10. FAQs and Troubleshooting
Q: What if a user’s payment doesn’t confirm?
A: Implement timeout logic and provide clear instructions. Users can retry or contact support with their transaction hash.
Q: Can I accept tokens other than stablecoins?
A: Yes! But stablecoins (USDC, USDT) offer price stability. Native tokens may need price conversion logic.
Q: How do I handle refunds?
A: Crypto transactions are irreversible. Build refund workflows that send tokens back to user wallets with proper verification.
Q: Is x402 secure?
A: Yes, when implemented correctly. Never store private keys client-side, always verify payments server-side.
Q: What about gas fees?
A: Layer 2 solutions like Base keep fees under $0.01. For micropayments, this is negligible.
🆘 Have other questions? Our Telegram community has members online 24/7 ready to help!
Ready to Build the Future of Web Payments?
You now have everything you need to integrate x402 payments into your website. But you don’t have to do it alone!
🚀 Join Our Growing Community
Click here to join our Telegram group and get:
✅ Live developer support - Get answers in minutes, not days
✅ Ready-to-use code - Copy-paste solutions from working projects
✅ Early opportunities - Discover new x402 projects before they trend
✅ Networking - Connect with builders, investors, and innovators
✅ Exclusive content - Tutorials, case studies, and insider tips
✅ Collaboration - Find partners, co-founders, or clients
Don’t build in isolation—join 1000+ developers already making money with x402!
👉 Join the x402 Telegram Community Now 👈
What’s Next?
After integrating x402, consider:
Building additional payment features
Exploring x402 token opportunities
Contributing to open-source x402 tools
Sharing your success story with the community
See you in Telegram! Let’s build the future together. 💪
https://t.me/+C4-U7-LYuFo0N2U9
Questions? Comments? Drop them below or head straight to our Telegram for instant answers!